How to Use the Dynamic Request Parameter on Your WordPress Website - Best Webhosting
Thanks! Share it with your friends!
 ULTRAFAST, CHEAP, SCALABLE AND RELIABLE! WE STRONGLY RECOMMEND ACCU
WEB HOSTING COMPANY
ULTRAFAST, CHEAP, SCALABLE AND RELIABLE! WE STRONGLY RECOMMEND ACCU
WEB HOSTING COMPANY
Watch Wordpress Elementor Page Builder Video: How to Use the Dynamic Request Parameter on Your WordPress Website.
The Dynamic Request Parameter is a new and improved way to pass user information inside Elementor.
You can use it to track traffic sources, campaigns and conversions as well as show a personalized message to your visitors and even pre-populate forms with your user’s info!
Get Elementor : https://elementor.com/
Join Pro: https://elementor.com/pro/
Related Videos
-

How to Allow Your Website Visitors to Request a Callback
Added 82 Views / 0 LikesIn today’s video, we're going to learn how to allow your website visitors to request a callback. Blog post: https://www.elegantthemes.com/blog/tips-tricks/how-to-allow-your-website-visitors-to-request-a-callback Like us on Facebook: https://www.facebook.com/elegantthemes/
-

How to Add a Dynamic Lightbox to Your WordPress Website
Added 84 Views / 0 LikesUsing Elementor, you can easily add a dynamic lightbox for videos and images on your WordPress website or blog. In this video, we'll go over all the settings and options so you can set up your own dynamic lightbox in minutes. Get Elementor : https://elementor.com/ Join Pro: https://elementor.com/pro/
-

How to Use the Dynamic Contact URL on Your WordPress Website
Added 85 Views / 0 LikesWith Elementor's Dynamic Contact URL, you can connect your website's visitors to WhatsApp, Waze, Google Calendar & more apps with one click. Get Elementor : https://elementor.com/ Join Pro: https://elementor.com/pro/
-

Create a Dynamic Personal Website in WordPress
Added 79 Views / 0 LikesIn this tutorial, we combine Elementor and PODS (a Custom Fields plugin) to create a dynamic personal website for WordPress. You'll learn how to: • Use dynamic content • Create custom fields with PODS • Edit a single post template with Elementor Subscribe to our Youtube channel and be the first to get our videos! To learn more about WordPress, Elementor, and Custom Post Types: https://elementor.com/wordpress-custom-post-types/ Use Dynamic Content, as
-

Advanced Tutorial: How to Use Dynamic User Profile Pictures & Dynamic Numbers in Elementor
Added 85 Views / 0 LikesIn this tutorial, you’ll learn how to use the Dynamic User Profile Picture and Dynamic Number features, which can be used to create advanced personalized project overview pages for your clients. You'll learn how to: •︎ Set up a dynamic user profile image for your landing page or Wordpress website •︎ Add dynamic numbers to your counter widget & progress bars •︎ And more! Link to the script: https://developers.elementor.com/mini-tutorial-custom-dynamic-
-

How to Use Divi’s Dynamic Content Feature to Design a Dynamic Post Layout
Added 95 Views / 0 LikesMultistreaming with https://restream.io/ Hey Divi Nation, welcome to a brand new Divi Use Case live stream where each week we show you how to add new design and functionality to your Divi website. Divi’s new Dynamic Content feature gives us the ability to build dynamic layouts for blog posts (and a lot more). In this tutorial, I’m going to show you how to build a dynamic post layout in Divi. By starting with a premade layout, I’ll walk you through the
-

Elementor Dynamic Content With Dynamic Conditions To Show/Hide Data
Added 70 Views / 0 LikesIn the most recent tutorial we created a custom custom loop to use in Elementor so that we could display advanced custom fields (ACF) data right in the loop. In this tutorial we're going to enhance that loop. In websites built with ACF there are often fields that are not required, which means the post creator doesn't have to fill out every field, like where they were when they first heard Thriller by Michael Jackson. The trouble is that page designs r
-

How to Create a Request a Quote Form in WordPress Step by Step
Added 29 Views / 0 LikesAre you wanting to add a request a quote form in WordPress? These request a quote forms are a great way for your potential customers to contact you for pricing information for your product or service. This is very handy for businesses that offer value-based pricing. In this video, we'll show you how to create a request a quote form on your WordPress site. This video brought to you by WPForms, the most beginner friendly WordPress form plugin, take a lo
-
Popular

HTML5 Video Loop - Embed Code & Loop Parameter On Blog Post
Added 136 Views / 0 LikesHTML5 Video Loop - Embed Code & Loop Parameter On Blog Post https://youtu.be/UfFIs20xZ6k Code on the blog: https://wplearninglab.com/html5-video-embed-loop-autoplay/ HTML5 video loop is easy to do. All you have to do is add the loop parameter to the video tag. You can find the full embed code in the blog post. Exclusive for WPLearningLab viewers, up to 50% off hosting: https://wplearninglab.com/wordpress-hosting-offer/ Stop brute force attacks before
-
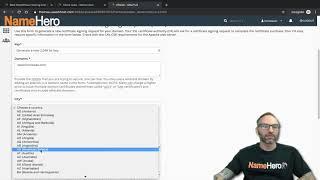
How To Generate a New Certificate Signing Request (CSR) in cPanel
Added 97 Views / 0 LikesIn this video I show how to quickly and easily generate a New Certificate Signing Request (CSR) inside of cPanel. Of course, SSL is free and automatic on ALL web hosting packages at NameHero, but if you’re wanting to purchase a premium SSL certificate for any reason (i.e. eCommerce) you will need this request in order to generate the certificate. You can learn more about our world-class cloud Web hosting here: https://www.namehero.com/web-hosting.php
-
JS Package Spotlight Ep.1 - Moment, BcryptJS, JWT Simple, Request & More
Added 77 Views / 0 LikesIn this episode we will look at the following NPM/JavaScript packages.... Sponsor: DevMountain Bootcamp https://goo.gl/6q0dEa Moment (2:30) - https://github.com/moment/moment Node Slug (10:19) - https://github.com/Trott/node-slug Bctypt.js (12:58) - https://github.com/dcodeIO/bcrypt.js/ Jwt-Simple (19:46) - https://github.com/hokaccha/node-jwt-simple Node Config (24:30) - https://github.com/lorenwest/node-config Node UUID (28:00) - https://github.com/
-
Popular
How to upload dynamic website on online server | PHP MySQL
Added 111 Views / 0 LikesHow to upload/publish a dynamic php mysql based website on online server. In this video I will tell you how you can host your dynamic website to online server using godaddy Cpanel, but procedure is almost same for all. Publish your website from localhost to online server is very easy because you have to follow some easy steps which I will share in this Video. - Login to your CPanel of your web hosting. - Create a Database and MySQL User. - Connect Dat